Introduction
In this tutorial, we'll walk through fetching NFTs held by an Address using the FuseBox REST API.
Prerequisites
Before starting, ensure you have the following:
- Node.js installed on your machine.
- Code Editor: Use your preferred code editor. VS Code is recommended.
- An EOA wallet with a private key. You can use an existing one or create a new wallet.
- A basic understanding of React.js and Next.js.
- An API key from the Fuse Console. Get one here.
Step 1: Set Up a Next.js Project
If you haven't already set up a Next.js project, you can create one using the following commands:
npx create-next-app my-project
cd my-project
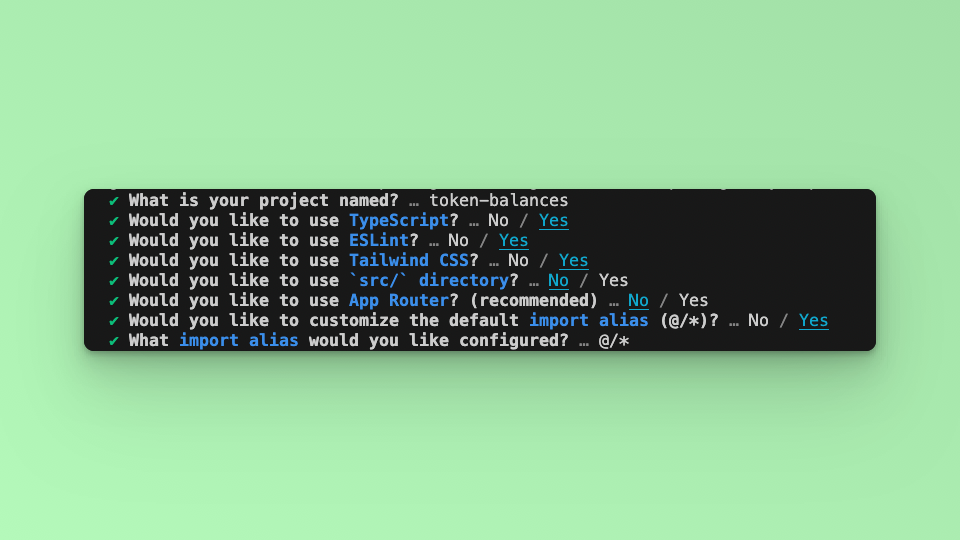
Answer the required prompts from NextJS in the terminal.
Note that we use javascript without TypeScript and Tailwind CSS for this application.
Step 2: Update the UI
In this example tutorial, we are going to build a Form element that takes in any External Owned Address or Smart Contract Address and return its NFTs collections. We will use the Fetch API method to call the Fuse REST APIs and parse the results to a UI.
The end point that we will use in this tutorial is the Get Non Fungible NFT Token Balances.
The URL takes in the EOA or SCA, below is an example:
Replace API_KEY with your actual apiKey too see the response. Get an API KEY.
Step 3: Fetch the API response.
In this step, we will test calling the API and parsing the response to the web browser console. Add the following code to index.tsx before the return statement.
const apiUrl = `https://api.fuse.io/api/v0/balances/nft-assets/0x07dc9cb1d2f8e7acf92c856cf43467936203f26a?apiKey=API_KEY`;

async function fetchNFTData() {
  try {
    console.log("Fetching NFTs for address:", address);
    const response = await fetch(apiUrl);
    if (!response.ok) {
      throw new Error("Network response was not ok");
    }
    const data = await response.json();
    console.log("NFT Data:", data);
    if (
      data &&
      data.data &&
      data.data.account &&
      data.data.account.collectibles
    ) {
      setNftData(data.data.account.collectibles);
    } else {
      setNftData([]); // Ensures nftData is reset to an empty array if no collectibles are found
    }
  } catch (error) {
    console.error("There was a problem with the fetch operation:", error);
    setNftData([]); // Reset on error to ensure no invalid data structures are used
  }
}

fetchData();
Save the file.
Run the application using the command:
npm run dev
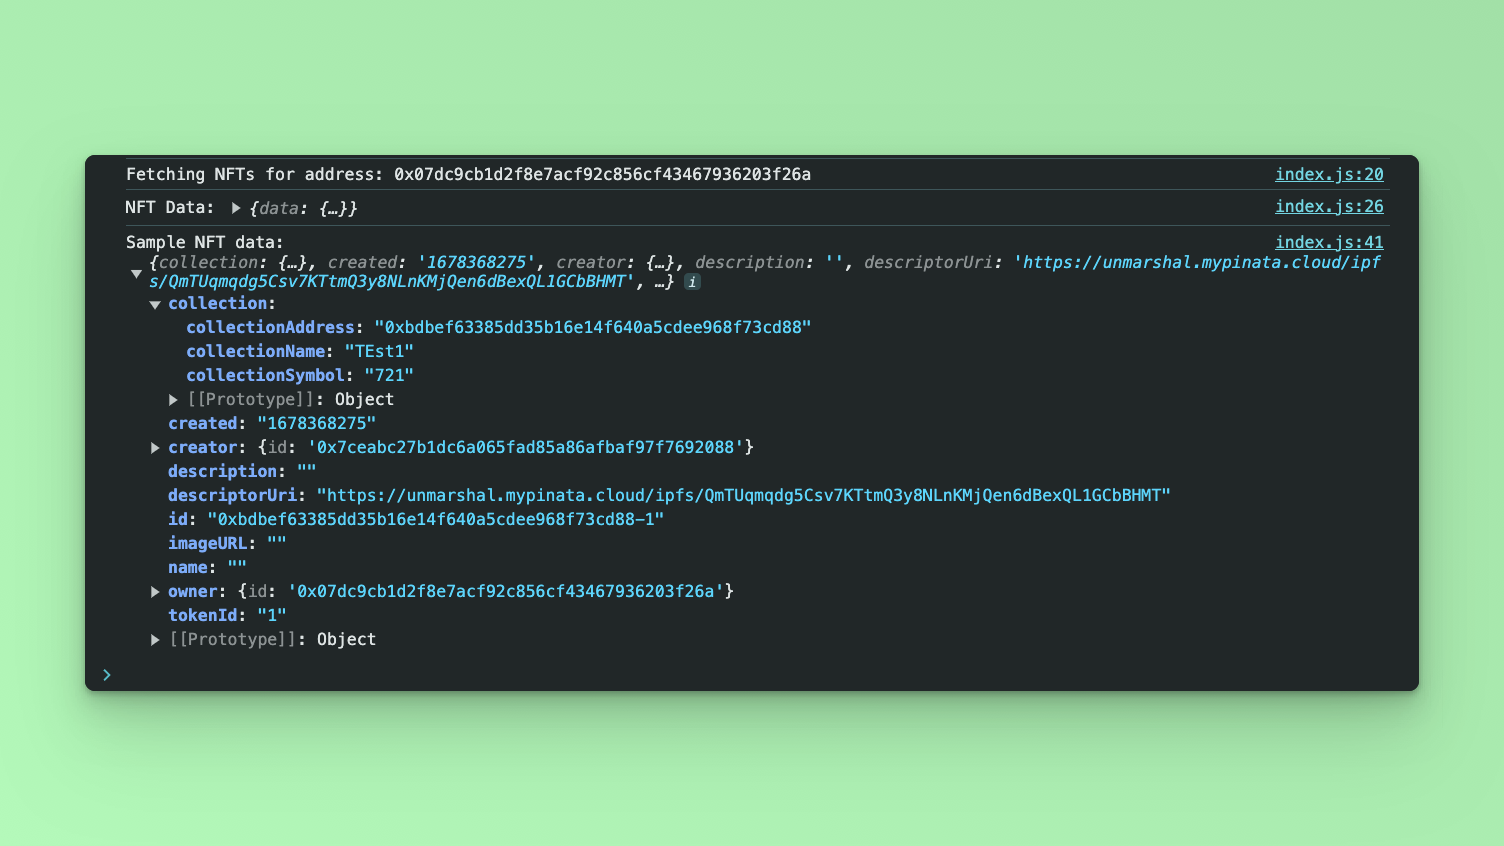
Open your browser go to http://localhost:3000 and open the developer console, you will find the results logged to the console.
Step 4: Display response via UI.
Create a state to store the responses from the Fetch call.
const [nftData, setNftData] = useState([]);
To display the results on the UI add the map() method inside the return statement:
<div className="mt-8 grid grid-cols-3 gap-4">
  {nftData.map((nft, index) => (
    <div
      key={index}
      className="bg-white shadow overflow-hidden sm:rounded-lg p-4"
    >
      {nft.imageURL && (
        <img
          src={nft.imageURL}
          alt={nft.name || "NFT Image"}
          className="w-full h-auto"
        />
      )}
      <div className="p-4">
        <h3 className="text-lg leading-6 font-medium text-gray-900">
          {nft.name || "Unnamed NFT"}
        </h3>
        <p className="mt-1 max-w-2xl text-sm text-gray-500">
          {nft.description || "No description"}
        </p>
        <a
          href={nft.descriptorUri}
          target="_blank"
          rel="noopener noreferrer"
          className="text-blue-500 hover:text-blue-800"
        >
          View Metadata
        </a>
      </div>
    </div>
  ))}
</div>
Step 5: Form handling.
In this step, we add a form component with an input where users can enter any address instead of hard coding it to the URL. Add a form component to the application. Copy and paste the following code snippet inside the <main> component, before the map div in the index.tsx file.
<form onSubmit={handleReturnNFTs} className="flex max-w-md flex-col gap-4">
  <div className="mt-3">
    <label
      htmlFor="address-input"
      className="block mb-2 text-sm font-medium text-gray-900 dark:text-white"
    >
      Enter Address
    </label>
    <input
      type="text"
      id="address-input"
      value={address}
      onChange={(e) => setAddress(e.target.value)}
      placeholder="Enter Address"
      className="bg-gray-50 border border-gray-300 text-gray-900 text-sm rounded-lg focus:ring-blue-500 focus:border-blue-500 block w-full p-2.5 dark:bg-gray-700 dark:border-gray-600 dark:placeholder-gray-400 dark:text-white dark:focus:ring-blue-500 dark:focus:border-blue-500"
    />
  </div>
  <button
    type="submit"
    className="focus:outline-none text-white bg-green-700 hover:bg-green-800 focus:ring-4 focus:ring-green-300 font-medium rounded-lg text-sm px-5 py-2.5 me-2 mb-2 dark:bg-green-600 dark:hover:bg-green-700 dark:focus:ring-green-800"
  >
    Fetch NFTs
  </button>
</form>
Add a state to handle the address from the input. When the address is received from the Form input, it will be parsed to the API URL as a parameter address=${address} replacing the hardcoded address.
const [address, setAddress] = useState < string > "";
Update the apiUrl, use backticks:
const apiUrl = `https://api.fuse.io/api/v0/balances/nft-assets/${address}?apiKey=API_KEY`;
Update the Form Input elements by adding value and onchange arguments. We will set the state when calling onchange:
value={address}
onChange={(e) => setAddress(e.target.value)}
Update the Form submit argument by parsing handleReturnNFTs:
onSubmit = { handleReturnNFTs };
Before saving the file, move the FetchData call to the handleReturnBalances, so that we can get the response as soon as we hit submit on the Form:
const handleReturnNFTs = async (e) => {
  e.preventDefault();
  fetchNFTData();
};
Add a useEffect to handle page side-effects:
useEffect(() => {
  if (nftData.length > 0) {
    console.log("Sample NFT data:", nftData[0]);
  }
}, [nftData]);
Save the file. Run the application using the following command:
npm run dev
Visit http://localhost:3000 in your browser to see the application in action. You should see a Form. When you enter an address and click Submit, the response will be displayed.

Complete code
This example code creates a web application that allows users to enter an address, fetch its NFTs balances using a REST API, and display the data.
Checkout the complete code. 💻