Introduction
In this tutorial, we'll walk through fetching token balances for a Smart Contract Wallet using the Fusebox Web SDK in a Next.js application. We'll utilize React hooks to manage the State and display the token balances in a table format.
Prerequisites
Before starting, ensure you have the following:
- Node.js installed on your machine.
- Code Editor: Use your preferred code editor; VS Code is recommended.
- An EOA wallet with a private key. You can use an existing one or create a new wallet.
- A basic understanding of React.js and Next.js.
- An API key from the Fuse Console. Get one here.
Step 1: Set Up a Next.js Project
If you haven't already set up a Next.js project, you can create one using the following commands:
npx create-next-app my-project
cd my-project
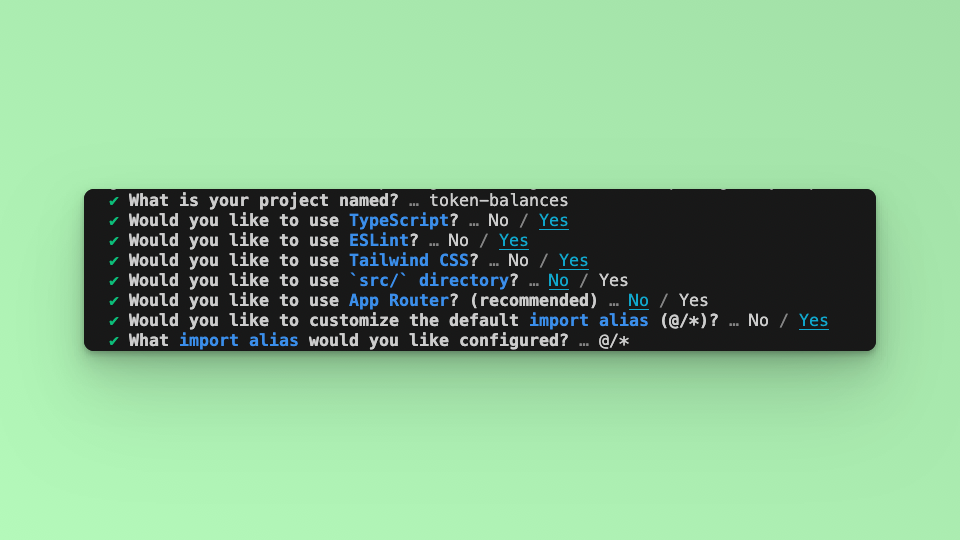
Answer the required prompts from NextJS in the terminal. We must note that we use TypeScript and Tailwind CSS for this application.
Step 2: Install Required Packages
Install the necessary packages by running the following command in your project directory:
npm install @fuseio/fusebox-web-sdk ethers
Step 3: Import Libraries
Open the index.tsx file, delete the default code from NextJS. Edit index.tsx file by adding the code below and save it to see the updated result in your browser. First, import the required libraries and put up a default `Hello, World!’ text:
import { FuseSDK } from "@fuseio/fusebox-web-sdk";
import { ethers } from "ethers";

export default function Home() {
  return (
    <main className={`flex flex-col items-center p-24 ${inter.className}`}>
      Hello, World!
    </main>
  );
}
Step 4: Run the Development Server
Run npm run dev to start the development server. Visit http://localhost:3000 to view your application.
Step 5: Initialize the App State
We are going to first get the Smart Contract Wallet, and it's owned Tokens and their respective balances. We will handle these information in various state and set/call each as required. We will also implement an App Loading state while waiting for the Promise methods to be resolved.
  const [smartAccount, setSmartAccount] = useState<string>('')
  const [tokenNames, setTokenNames] = useState<Token[]>([])
  const [balances, setBalances] = useState<Record<string, string>>({})
  const [loading, setLoading] = useState<boolean>(true)
The Token type interface is:
interface Token {
  name: string
  address: string
}
Step 6: implement methods
We will implement the methods: init, getSender, getTokenList and getTokenBalance in one method call. Declare the method as smartWalletBalance. Update the smartWalletBalance method with the following code:
// pages/index.js
  const smartWalletBalance = async () => {
    setLoading(true)
    try {
      const apiKey = 'API_KEY'
      const credentials = new ethers.Wallet(
        `0xPrivateKey`
      )
      const fuseSDK = await FuseSDK.init(apiKey, credentials, {
        withPaymaster: true,
      })
      const sender = fuseSDK.wallet.getSender()
      console.log('Sender Address:', sender)
      if (!sender) {
        console.error('No sender address available')
        setLoading(false)
        return
      }
      setSmartAccount(sender)

      const tokenListResponse = await fuseSDK.explorerModule.getTokenList(
        sender
      )
      console.log('Token List Response:', tokenListResponse)
      if (!Array.isArray(tokenListResponse)) {
        console.error(
          'Token list fetch returned a non-array response:',
          tokenListResponse
        )
        setLoading(false)
        return
      }
      setTokenNames(tokenListResponse)

      const fetchedBalances = {}
      for (const token of tokenListResponse) {
        const balance = await fuseSDK.explorerModule.getTokenBalance(
          token.address,
          sender
        )
        fetchedBalances[token.address] = balance
      }
      setBalances(fetchedBalances)

    } catch (error) {
      console.error('Error fetching data:', error)
    } finally {
      setLoading(false)
    }
  }
Replace "YOUR_API_KEY" and "YOUR_PRIVATE_KEY" with your actual API key and private key.
Step 7: Update the UI
Update the UI to a Dashboard that displays the information from calling the smartWalletBalance. Paste the following code in the return section.
    <main className={`flex flex-col items-center p-24`}>
      <h1>Hello, World!</h1>
      <p>Smart account address: {smartAccount}</p>
      {loading ? (
        <p>Loading...</p>
      ) : (
        <div className={`relative overflow-x-auto shadow-md sm:rounded-lg mt-12`}>
          <table className='w-full text-sm text-left rtl:text-right text-gray-500 dark:text-gray-400'>
            <thead className='text-xs text-gray-700 uppercase dark:text-gray-400'>
              <tr>
                <th
                  scope='col'
                  className='px-6 py-3 bg-gray-50 dark:bg-gray-800'
                >
                  Token Name
                </th>
                <th scope='col' className='px-6 py-3'>
                  Token Address
                </th>
                <th
                  scope='col'
                  className='px-6 py-3 bg-gray-50 dark:bg-gray-800'
                >
                  Amount
                </th>
              </tr>
            </thead>
            <tbody>
              {tokenNames.map((token) => (
                <tr key={token.address}>
                  <td>{token.name}</td>
                  <td>{token.address}</td>
                  <td>
                    {balances[token.address]
                      ? Number(balances[token.address]).toString()
                      : '0'}
                  </td>
                </tr>
              ))}
            </tbody>
          </table>
        </div>
      )}
    </main>
Step 8: Run Your Next.js Application
Call the smartWalletBalance in a useEffect Hook:
useEffect(() => {
    smartWalletBalance()
}, [])
Run your Next.js application using the following command:
npm run dev
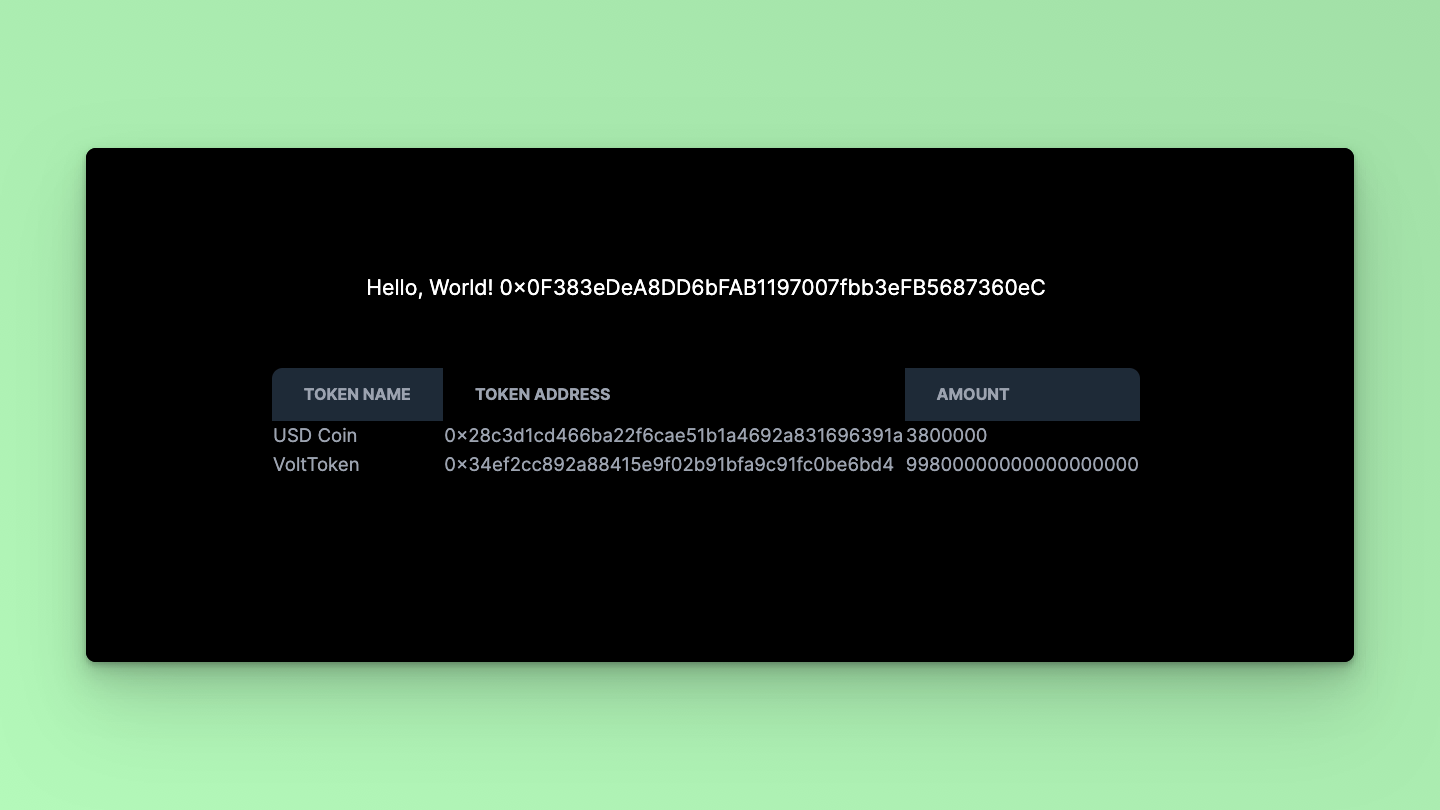
Visit http://localhost:3000 in your browser to see the application in action. You should see a table displaying the token names, addresses, and amounts associated with the Smart Contract Wallet.
That's it! Using the Fusebox Web SDK, you've successfully fetched and displayed token balances for a Smart Contract Wallet in a Next.js application. You can further customize the UI or add additional features per your requirements.
Step 9: Code breakdown
Let's break down the smartWallet function and explain the usage of the getTokenList and getTokenBalance methods:
const smartWalletBalance = async () => {
 setLoading(true)
 try {
   // Initialize FuseSDK with API key and credentials
   const apiKey = "YOUR_API_KEY"; // Replace with your API key
   const credentials = new ethers.Wallet(`YOUR_PRIVATE_KEY`); // Replace with your private key
   const fuseSDK = await FuseSDK.init(apiKey, credentials, {
     withPaymaster: true,
   });

   // Get the Smart Account Address
   const sender = fuseSDK.wallet.getSender()
   console.log('Sender Address:', sender)
      if (!sender) {
        console.error('No sender address available')
        setLoading(false)
        return
    }
    setSmartAccount(sender)

   // Get the list of tokens held by the Smart Contract Wallet
   const tokenListResponse = await fuseSDK.explorerModule.getTokenList(sender)
   console.log('Token List Response:', tokenListResponse)
   if (!Array.isArray(tokenListResponse)) {
        console.error(
          'Token list fetch returned a non-array response:',
          tokenListResponse
        )
        setLoading(false)
        return
    }
    setTokenNames(tokenListResponse)


   // Extract token addresses from the token list
   const tokenAddresses = tokenList.map((x) => x.address);

   // Fetch balances for each token
   const fetchedBalances = {}
      for (const token of tokenListResponse) {
        const balance = await fuseSDK.explorerModule.getTokenBalance(
          token.address,
          sender
        )
        fetchedBalances[token.address] = balance
    }

    // Update the balances state with the fetched balances
    setBalances(fetchedBalances);
 };
}
Now let's explain each part of the smartWallet function:
Initialization:
- We initialize the FuseSDK using the provided API key and credentials using
FuseSDK.init(). - The
withPaymaster: trueoption enables the use of a paymaster.
- We initialize the FuseSDK using the provided API key and credentials using
Getting Smart Account Address:
- We retrieve the address of the Smart Account using
fuseSDK.wallet.getSender()and set it to thesmartAccountstate variable.
- We retrieve the address of the Smart Account using
Getting Token List:
- We use
fuseSDK.explorerModule.getTokenList(smartAccount)to fetch the list of tokens held by the Smart Contract Wallet. - This method returns an array of objects, each containing information about a token, such as symbol, name, and address.
- We set this array of token objects to the
tokenNamesstate variable.
- We use
Extracting Token Addresses:
- We extract the token addresses from the
tokenListarray using themap()function and store them in thetokenAddressesarray.
- We extract the token addresses from the
Fetching Balances:
- We initialize an empty object,
fetchedBalances, to store the token balances. - We iterate over each
tokenAddressin thetokenAddressesarray. - For each
tokenAddress, we usefuseSDK.explorerModule.getTokenBalance(tokenAddress, smartAccount)to fetch the balance of that token held by the Smart Contract Wallet. - We store each balance in the
fetchedBalancesobject with thetokenAddressas the key.
- We initialize an empty object,
Updating State:
- Finally, we update the
balancesstate variable with thefetchedBalancesobject containing token balances.
- Finally, we update the
This breakdown explains how each part of the smartWallet function works and utilizes the getTokenList and getTokenBalance methods to fetch token information and balances for a Smart Contract Wallet.
Checkout the complete code. 💻