> ## Documentation Index
> Fetch the complete documentation index at: https://docs.fuse.io/llms.txt
> Use this file to discover all available pages before exploring further.
# FuseBox Web SDK Demo App - Smart Contract Wallet, Transfer Token and View Balance
# Introduction
This is a code lab on building a simple application where you can create a Smart Contract Wallet and start sending and receiving tokens without paying any Gas Fees!
At the end of this code lab, we will build an application that returns your Smart Contract Wallet Address, a Form that you can use to send tokens, and a display of the Tokens owned by the Smart Contract Wallet with their respective balances.
FuseBox leverages Account Abstraction out of the Box. It is an Open Source Wallet-As-A-Service platform and is ERC-4337 complaint. Providing Developers the ability to use a Bundler for collacting UserOperations, and also a Paymaster to sponsor Gas payments for their users to provide a Gasless experience.
## Prerequisites
Before we begin, ensure you have the following:
* Node.js is installed on your machine.
* Code Editor: Use your preferred code editor; VS Code is recommended.
* An EOA wallet with a private key. You can use an existing one or create a new wallet.
* A basic understanding of React.js and Next.js.
* An API key from the Fuse Console. Get one [here](https://console.fuse.io/build).
## Step 1: Set Up Your Next.js App
Create a new Next.js app:
```bash theme={null}
npx create-next-app my-fuse-demo-app
cd my-fuse-demo-app
```
Answer the required prompts from NextJS in the terminal. We must note that we use TypeScript and Tailwind CSS for this application.
 ## Step 2: Install Dependencies
Install the required dependencies:
```bash theme={null}
npm install @fuseio/fusebox-web-sdk
npm install ethers
```
## Step 3: Run the Development Server
Run npm run dev to start the development server. Visit `http://localhost:3000` to view your application.
## Step 4: Import Libraries
Open the index.tsx file, delete the default code from NextJS. Edit `index.tsx` file by adding the code below and save it to see the updated result in your browser. First, import the required libraries and put up a default \`Hello, World!’ text:
```javascript theme={null}
import { FuseSDK } from "@fuseio/fusebox-web-sdk";
import { ethers } from "ethers";
export default function Home() {
return (
Hello, World!
);
}
```
We are going to use the following FuseBox Web SDK methods to build the application:
Create a Smart Contract Wallet.
Transfer Token.
GET List of Tokens Owned by Address.
GET Token Balance.
## Step 5: Create a Smart Contract Wallet.
To use the SDK in your project, you must create an instance of the FuseSDK class. This class is the key to interacting with the Fuse API using the SDK.
The init method sets up a wallet and authenticates the user's provided credentials. It requires a API\_KEY from FuseBox. Create an Account and get the API\_KEY in the Fuse Developer Console [here](https://console.fuse.io/build). When you send a request to the server using this method, it verifies the credentials. If the credentials are valid, developers can use the `getSender()` to return an address.
To create the Smart Contract Wallet, we will update the code by adding a `smartWallet` function, and parsing the returned Smart Contract Address to a state variable.
Inside the `Home` Component, import the useState method:
```javascript theme={null}
import { useState, useEffect } from 'react'
```
Set the state variable to manage the state of the Smart Contract Account that will be created:
```javascript theme={null}
const [smartAccount, setSmartAccount] = useState("")
```
Add the `smartWallet` function:
```javascript theme={null}
const smartWallet = async() => {
const apiKey = "API_KEY";
const credentials = new ethers.Wallet(`0xPrivateKey`);
const fuseSDK = await FuseSDK.init(apiKey, credentials, {
withPaymaster: true,
});
setSmartAccount(fuseSDK.wallet.getSender());
console.log(
`Smart account address: https://explorer.fuse.io/address/${fuseSDK.wallet.getSender()}`
);
}
```
To call the function and render the response in the application UI, we have to use the setEffect hook to prevent too many re-renders, add the useEffect hook:
```javascript theme={null}
import { useState, useEffect } from ’react’;
```
Add the useEffect Hook:
```javascript theme={null}
useEffect(()=> {
smartWallet()
}, [])
```
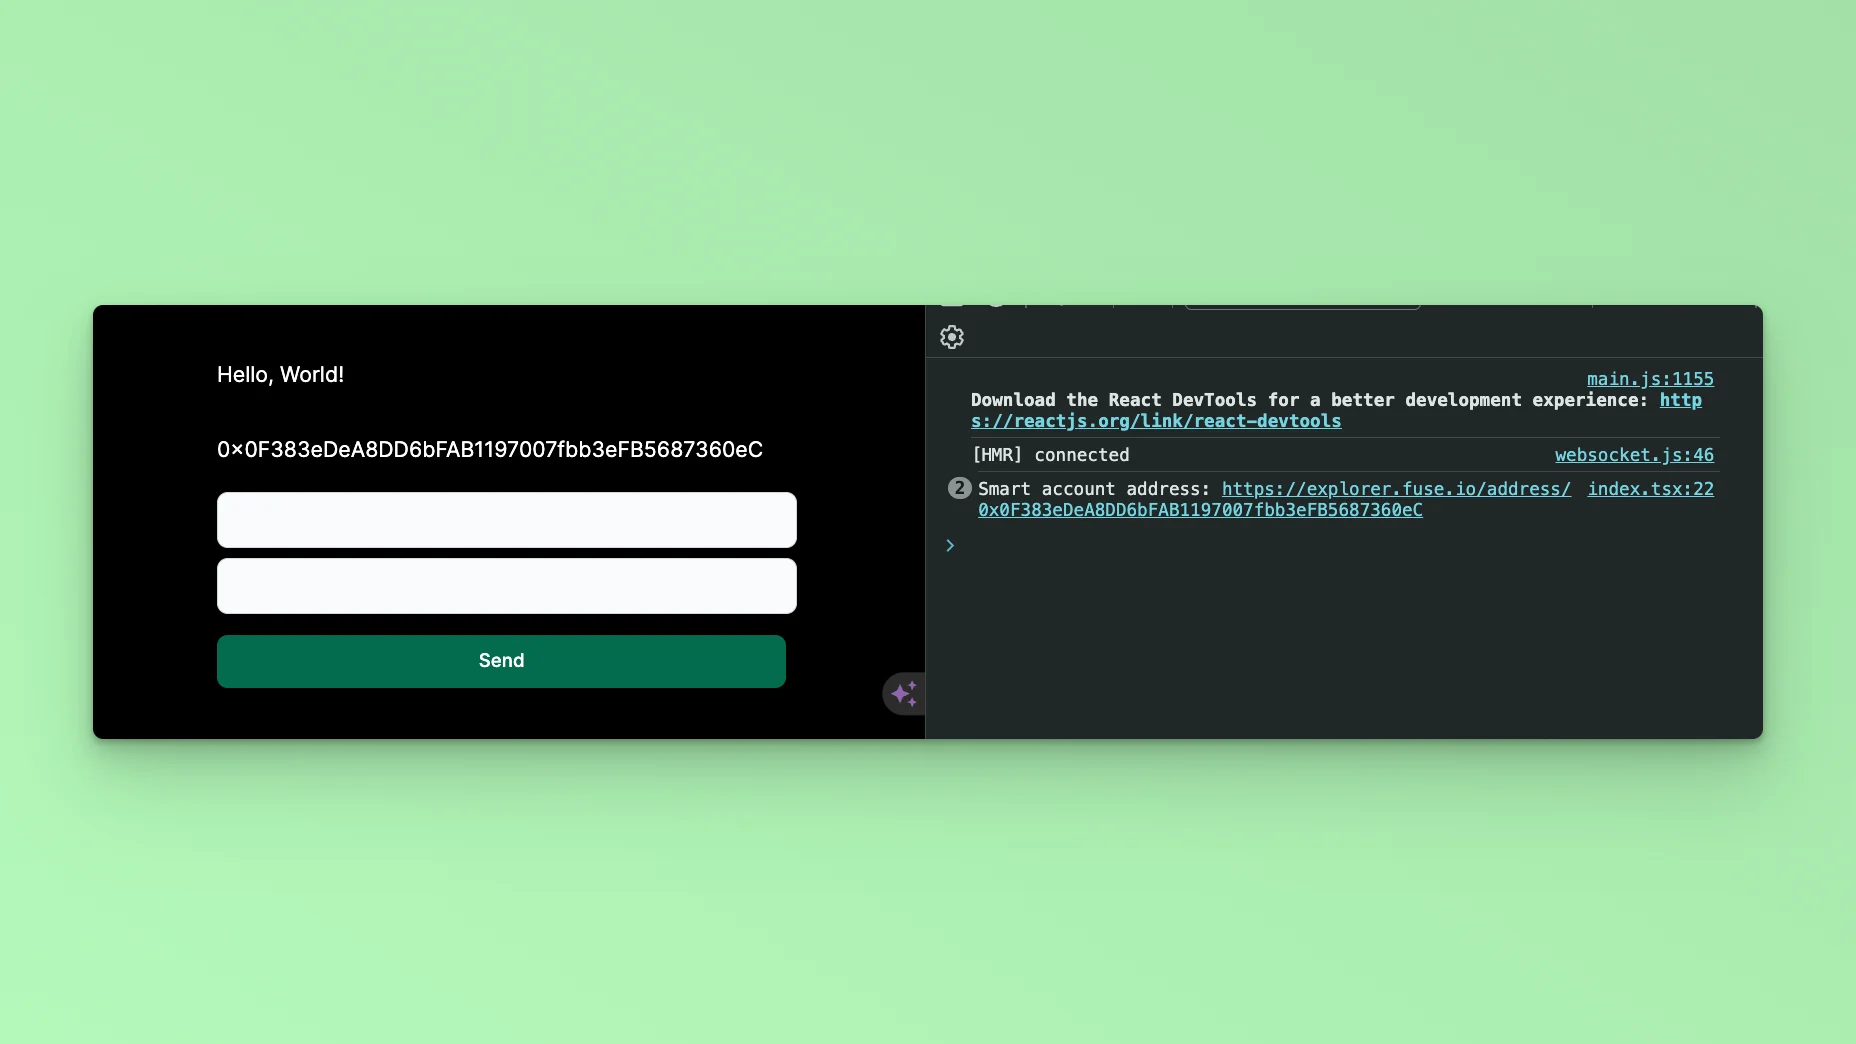
Reload the app and open the console. The newly created Smart Contract Address will be logged into the Console!
To return the Smart Contract Address to the UI, you can parse the stored state variable:
```javascript theme={null}
return (
Hello, World!
{smartAccount}
);
```
## Step 2: Install Dependencies
Install the required dependencies:
```bash theme={null}
npm install @fuseio/fusebox-web-sdk
npm install ethers
```
## Step 3: Run the Development Server
Run npm run dev to start the development server. Visit `http://localhost:3000` to view your application.
## Step 4: Import Libraries
Open the index.tsx file, delete the default code from NextJS. Edit `index.tsx` file by adding the code below and save it to see the updated result in your browser. First, import the required libraries and put up a default \`Hello, World!’ text:
```javascript theme={null}
import { FuseSDK } from "@fuseio/fusebox-web-sdk";
import { ethers } from "ethers";
export default function Home() {
return (
Hello, World!
);
}
```
We are going to use the following FuseBox Web SDK methods to build the application:
Create a Smart Contract Wallet.
Transfer Token.
GET List of Tokens Owned by Address.
GET Token Balance.
## Step 5: Create a Smart Contract Wallet.
To use the SDK in your project, you must create an instance of the FuseSDK class. This class is the key to interacting with the Fuse API using the SDK.
The init method sets up a wallet and authenticates the user's provided credentials. It requires a API\_KEY from FuseBox. Create an Account and get the API\_KEY in the Fuse Developer Console [here](https://console.fuse.io/build). When you send a request to the server using this method, it verifies the credentials. If the credentials are valid, developers can use the `getSender()` to return an address.
To create the Smart Contract Wallet, we will update the code by adding a `smartWallet` function, and parsing the returned Smart Contract Address to a state variable.
Inside the `Home` Component, import the useState method:
```javascript theme={null}
import { useState, useEffect } from 'react'
```
Set the state variable to manage the state of the Smart Contract Account that will be created:
```javascript theme={null}
const [smartAccount, setSmartAccount] = useState("")
```
Add the `smartWallet` function:
```javascript theme={null}
const smartWallet = async() => {
const apiKey = "API_KEY";
const credentials = new ethers.Wallet(`0xPrivateKey`);
const fuseSDK = await FuseSDK.init(apiKey, credentials, {
withPaymaster: true,
});
setSmartAccount(fuseSDK.wallet.getSender());
console.log(
`Smart account address: https://explorer.fuse.io/address/${fuseSDK.wallet.getSender()}`
);
}
```
To call the function and render the response in the application UI, we have to use the setEffect hook to prevent too many re-renders, add the useEffect hook:
```javascript theme={null}
import { useState, useEffect } from ’react’;
```
Add the useEffect Hook:
```javascript theme={null}
useEffect(()=> {
smartWallet()
}, [])
```
Reload the app and open the console. The newly created Smart Contract Address will be logged into the Console!
To return the Smart Contract Address to the UI, you can parse the stored state variable:
```javascript theme={null}
return (
Hello, World!
{smartAccount}
);
```
 ## Step 6: Token Transfers
Transfer Transactions which happen on the Blockchain are state-changing. In Account Abstraction these “Transactions” are called “UserOperations” because they are first sent to an alternate Mempool where they are then Bundled and sent on-chain. FuseBox uses the `transferToken` method to carry out a **UserOperation** of transferring a Token from one Address to another.
Add another Function `transferToken`:
```javascript theme={null}
const transferToken = async() => {
const tokenAddress = "0x28C3d1cD466Ba22f6cae51b1a4692a831696391A"
const apiKey = "API_KEY";
const credentials = new ethers.Wallet(`0xPrivateKey`);
const fuseSDK = await FuseSDK.init(apiKey, credentials, {
withPaymaster: true,
});
const recipient = "Enter ANY EOA or SCA address";
const amount = ethers.parseUnits(amountValue, 6)
const res = await fuseSDK.transferToken(tokenAddress, recipient, amount);
console.log(`UserOpHash: ${res?.userOpHash}`);
console.log("Waiting for transaction...");
const receipt = await res?.wait();
console.log(
`User operation hash: https://explorer.fuse.io/tx/${receipt?.transactionHash}`
);
}
```
The `transferToken` method takes in three arguments: `tokenAddress`, `recipient`, `amount`.
The `tokenAddress` is the address of the Token which we are sending a specific `amount` to a receiving address `recipient`. You can find a list of Token Addresses here: [https://explorer.fuse.io/tokens](https://explorer.fuse.io/tokens)
It is important to mention that when sending a Token, you will parse the token in units to the number of the decimal places which the Token is defined. For example, USDC has 6 decimal places. To send 1 USDC, you parse it thus:
```javascript theme={null}
ethers.parseUnits(“1”, 6)
```
Where the string “1” is the amount, and 6 the number of decimal places.
## Step 7: Form UI.
To carryout Token Transfer, the next step is to build a Form component where we can enter the recipient and amount values we want to transfer to.
Update the UI:
```javascript theme={null}
```
The Form above has two labels and a button. To use the form, we have to take the input data and pass it as arguments to the `transferToken` method.
Let’s write the state variables to store the `recipient` and `amount` values. In this example, we will keep the `tokenAddress` static as USDC.
```javascript theme={null}
const [toValue, setToValue] = useState(' ');
const [amountValue, setAmountValue] = useState(' ');
```
Add a handle method to take the input data
```javascript theme={null}
const handleTo = (e) => {
setToValue(e.target.value);
};
const handleAmount = (e) => {
setAmountValue(e.target.value)
};
```
The values are set in the state: recipient == toValue, amount == amountValue
Update the Form UI to handle the data and submit it:
```javascript theme={null}
```
Add a `handleSubmit` method:
```javascript theme={null}
const handleSubmit = (e) => {
e.preventDefault();
console.log("Input value:", toValue, amountValue);
transferToken();
};
```
Update the `transferToken` function to read the values stored in the state:
```javascript theme={null}
const res = await fuseSDK.transferToken(tokenAddress, toValue, amountValue);
```
You can carry out Token Transfers via the UI. Note that you have to get some USDC Token, or you can put the number ‘0’ in the amount field to see the success of the UserOperation. You can open the console to see the UserOperation logged.
To see the response returned via the UI, you can use the React Toastify Library. Below is a UI update parsing the Transaction to the UI using the React Toastify library:
First, install the Library:
```javascript theme={null}
npm install --save react-toastify
```
Import the Library:
```
import { ToastContainer, toast } from 'react-toastify';
```
Render the Component in the UI at the close of the `Form` Component
```javascript theme={null}
…
…
```
Add the toast method to the `transferToken` function.
```javascript theme={null}
…
toast("Waiting for transaction...")
console.log("Waiting for transaction...");
const receipt = await res?.wait();
console.log(
`User operation hash: https://explorer.fuse.io/tx/${receipt?.transactionHash}`
);
toast(`User operation hash: https://explorer.fuse.io/tx/${receipt?.transactionHash}`)
…
```
## Step 6: Token Transfers
Transfer Transactions which happen on the Blockchain are state-changing. In Account Abstraction these “Transactions” are called “UserOperations” because they are first sent to an alternate Mempool where they are then Bundled and sent on-chain. FuseBox uses the `transferToken` method to carry out a **UserOperation** of transferring a Token from one Address to another.
Add another Function `transferToken`:
```javascript theme={null}
const transferToken = async() => {
const tokenAddress = "0x28C3d1cD466Ba22f6cae51b1a4692a831696391A"
const apiKey = "API_KEY";
const credentials = new ethers.Wallet(`0xPrivateKey`);
const fuseSDK = await FuseSDK.init(apiKey, credentials, {
withPaymaster: true,
});
const recipient = "Enter ANY EOA or SCA address";
const amount = ethers.parseUnits(amountValue, 6)
const res = await fuseSDK.transferToken(tokenAddress, recipient, amount);
console.log(`UserOpHash: ${res?.userOpHash}`);
console.log("Waiting for transaction...");
const receipt = await res?.wait();
console.log(
`User operation hash: https://explorer.fuse.io/tx/${receipt?.transactionHash}`
);
}
```
The `transferToken` method takes in three arguments: `tokenAddress`, `recipient`, `amount`.
The `tokenAddress` is the address of the Token which we are sending a specific `amount` to a receiving address `recipient`. You can find a list of Token Addresses here: [https://explorer.fuse.io/tokens](https://explorer.fuse.io/tokens)
It is important to mention that when sending a Token, you will parse the token in units to the number of the decimal places which the Token is defined. For example, USDC has 6 decimal places. To send 1 USDC, you parse it thus:
```javascript theme={null}
ethers.parseUnits(“1”, 6)
```
Where the string “1” is the amount, and 6 the number of decimal places.
## Step 7: Form UI.
To carryout Token Transfer, the next step is to build a Form component where we can enter the recipient and amount values we want to transfer to.
Update the UI:
```javascript theme={null}
```
The Form above has two labels and a button. To use the form, we have to take the input data and pass it as arguments to the `transferToken` method.
Let’s write the state variables to store the `recipient` and `amount` values. In this example, we will keep the `tokenAddress` static as USDC.
```javascript theme={null}
const [toValue, setToValue] = useState(' ');
const [amountValue, setAmountValue] = useState(' ');
```
Add a handle method to take the input data
```javascript theme={null}
const handleTo = (e) => {
setToValue(e.target.value);
};
const handleAmount = (e) => {
setAmountValue(e.target.value)
};
```
The values are set in the state: recipient == toValue, amount == amountValue
Update the Form UI to handle the data and submit it:
```javascript theme={null}
```
Add a `handleSubmit` method:
```javascript theme={null}
const handleSubmit = (e) => {
e.preventDefault();
console.log("Input value:", toValue, amountValue);
transferToken();
};
```
Update the `transferToken` function to read the values stored in the state:
```javascript theme={null}
const res = await fuseSDK.transferToken(tokenAddress, toValue, amountValue);
```
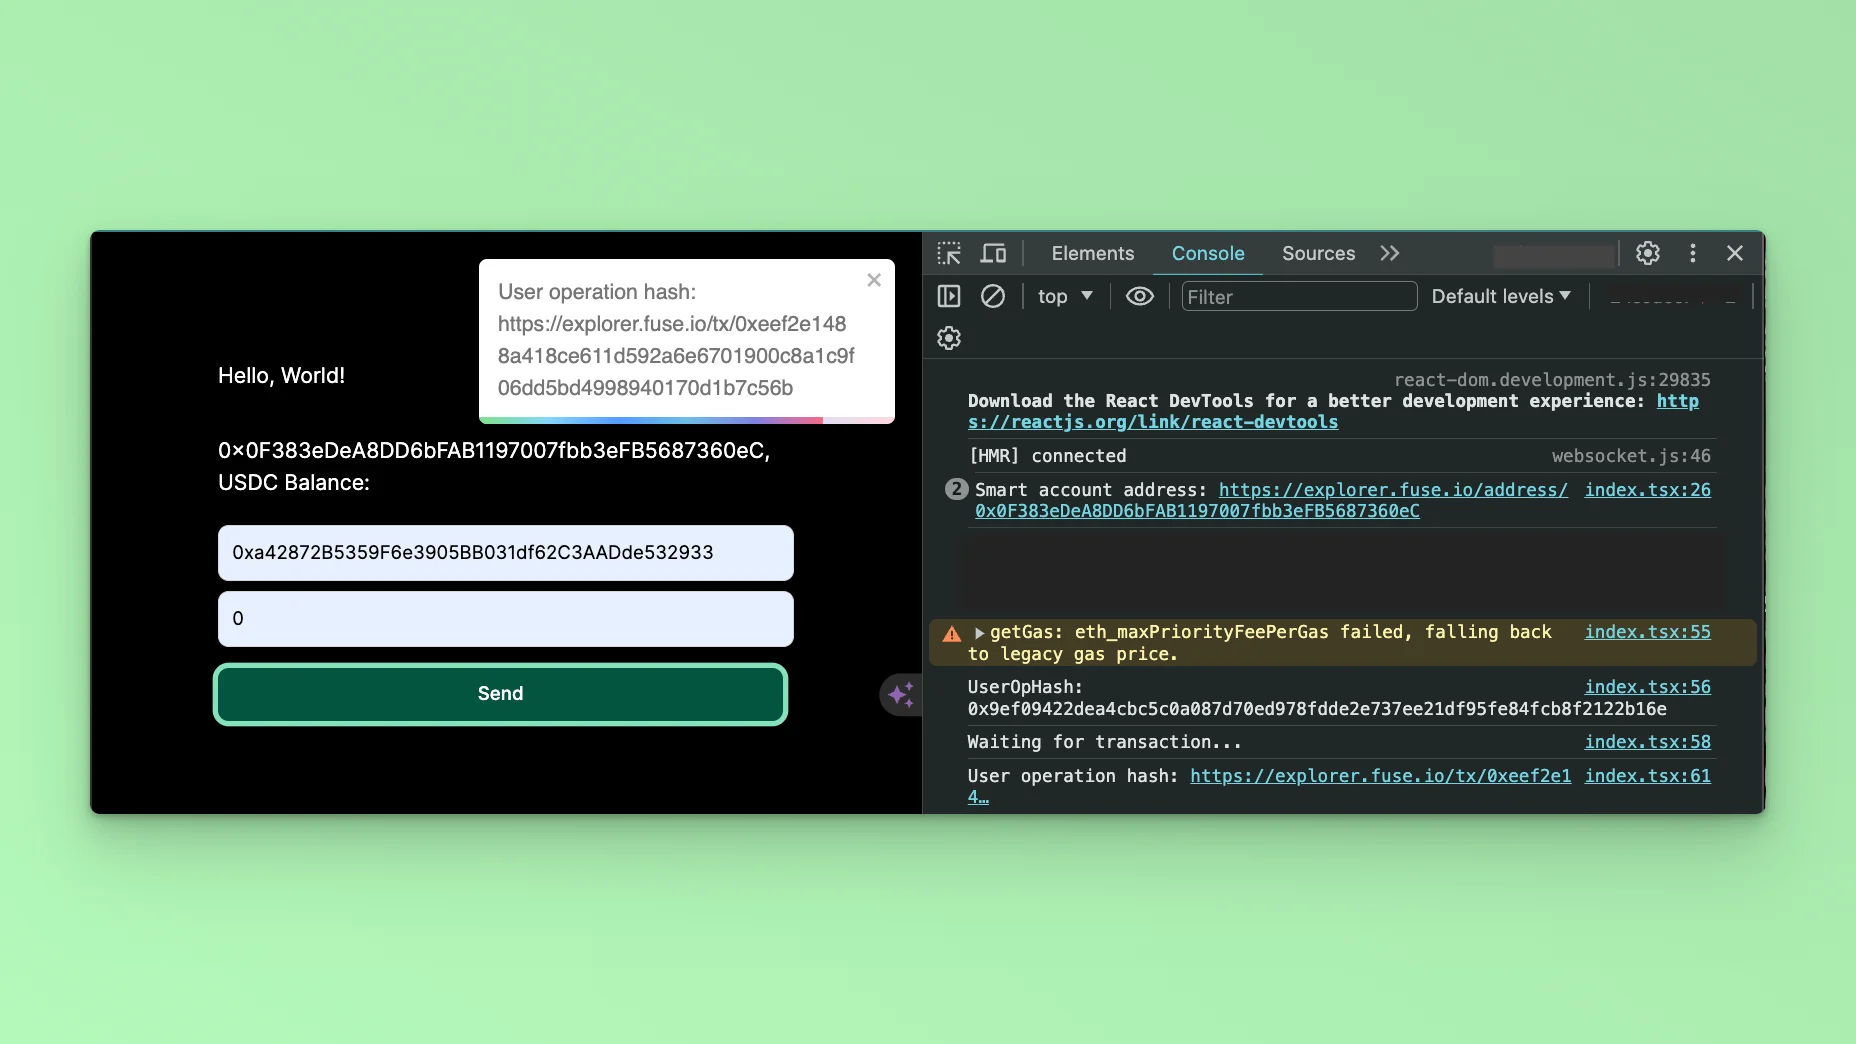
You can carry out Token Transfers via the UI. Note that you have to get some USDC Token, or you can put the number ‘0’ in the amount field to see the success of the UserOperation. You can open the console to see the UserOperation logged.
To see the response returned via the UI, you can use the React Toastify Library. Below is a UI update parsing the Transaction to the UI using the React Toastify library:
First, install the Library:
```javascript theme={null}
npm install --save react-toastify
```
Import the Library:
```
import { ToastContainer, toast } from 'react-toastify';
```
Render the Component in the UI at the close of the `Form` Component
```javascript theme={null}
…
…
```
Add the toast method to the `transferToken` function.
```javascript theme={null}
…
toast("Waiting for transaction...")
console.log("Waiting for transaction...");
const receipt = await res?.wait();
console.log(
`User operation hash: https://explorer.fuse.io/tx/${receipt?.transactionHash}`
);
toast(`User operation hash: https://explorer.fuse.io/tx/${receipt?.transactionHash}`)
…
```
 ## Conclusion
This tutorial has provided a comprehensive guide on utilizing the FuseBox Web SDK to develop a Demo App for creating Smart Wallet Accounts and executing transfers, all seamlessly integrated with the NextJS UI framework. Throughout the tutorial, we've explored the fundamentals of integrating the FuseBox Web SDK into a Next.js project, including initializing the SDK, managing smart wallet accounts, and implementing transfer functionalities.
This tutorial is a valuable resource for developers looking to harness the power of FuseBox and NextJS to create innovative blockchain-based applications. With the knowledge gained from this tutorial, developers can confidently embark on their journey to build cutting-edge solutions that empower users to interact with digital assets securely and efficiently. To stretch your knowledge, you can use the `GET Smart Wallet Token Balance` to implement viewing the Balance of the Smart Contract Wallet.
Checkout the complete [code](https://github.com/fuseio/examples/tree/master?tab=readme-ov-file#example-projects). 💻
## Conclusion
This tutorial has provided a comprehensive guide on utilizing the FuseBox Web SDK to develop a Demo App for creating Smart Wallet Accounts and executing transfers, all seamlessly integrated with the NextJS UI framework. Throughout the tutorial, we've explored the fundamentals of integrating the FuseBox Web SDK into a Next.js project, including initializing the SDK, managing smart wallet accounts, and implementing transfer functionalities.
This tutorial is a valuable resource for developers looking to harness the power of FuseBox and NextJS to create innovative blockchain-based applications. With the knowledge gained from this tutorial, developers can confidently embark on their journey to build cutting-edge solutions that empower users to interact with digital assets securely and efficiently. To stretch your knowledge, you can use the `GET Smart Wallet Token Balance` to implement viewing the Balance of the Smart Contract Wallet.
Checkout the complete [code](https://github.com/fuseio/examples/tree/master?tab=readme-ov-file#example-projects). 💻